Getting a lot of calls from unknown numbers is frustrating, and a lot of people hate dealing with this. It can be very disruptive, making it hard to get anything done and making your phone – normally a useful tool – a nuisance.
Thankfully, if you’re an iPhone user, there are effective methods that will help you regain control of your phone experience and silence annoying unknown callers.
In this blog post, we will explain how to silence unknown callers on your iPhone, allowing you to enjoy uninterrupted communication and peace of mind. Say goodbye to those unwelcome interruptions and reclaim control over your phone.
The Need to Silence Unknown Callers: Protecting Your Privacy and Well-being
Most of the time, unknown callers are just a nuisance, although they can be a significant one. Getting calls can disrupt you when you’re working, trying to cook, looking after children, eating, or anything else. There are a lot of instances where a phone call is an irritation, especially if it’s unsolicited.
Furthermore, calls can pose risks if they come from unknown numbers. Scammers often use phones to target individuals and trick them into doing things that will make them vulnerable to fraud. There are thousands of phone scams designed to trick you, and being aware of this is crucial.
The safest way to deal with scam calls is not to answer them at all, but it can be disruptive to have a phone ringing endlessly in your house and not be able to answer it. Persistent scam callers make this an even harder strategy to implement.
This causes a lot of people to give in and answer their phones, which puts them at risk of being scammed. It’s very easy to get caught out, even if you think you know what to do. Not answering your phone is the safest option.
With that in mind, let’s learn what you can do to prevent your phone from irritating you without having to answer it.
Utilizing Do Not Disturb Mode: Temporarily Silencing All Incoming Calls
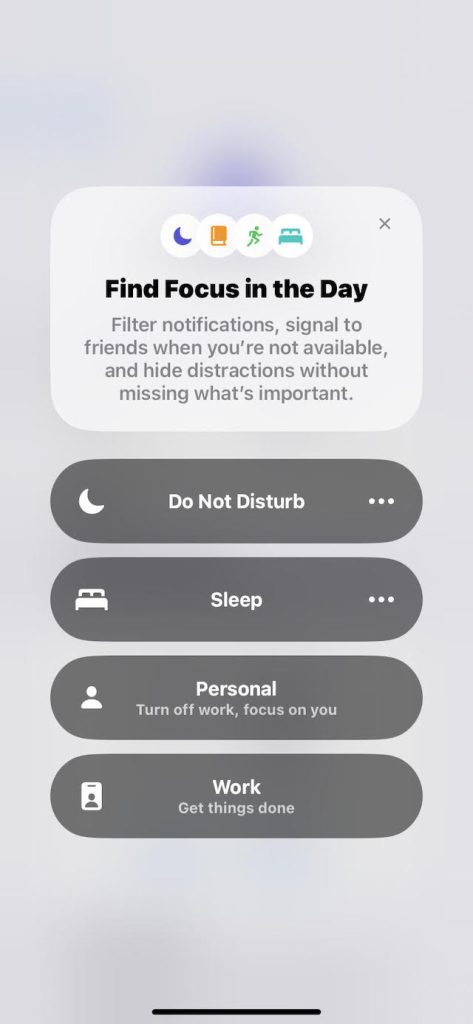
Do Not Disturb mode is one of the most commonly used ways to prevent disturbances. It will silence all incoming calls, including those from unknown numbers, making it much easier to avoid distractions.
It’s easy to set up Do Not Disturb on an iPhone. All you need to do is go into Settings and then click Focus. From there, simply tap Do Not Disturb, and all calls and notifications will be silenced while your phone is locked.
When this setting is turned on, you will see a crescent moon icon on your lock screen and your status bar.
Enabling Silence Unknown Callers Feature: Filter Unrecognized Numbers
Sometimes, you don’t want to turn off all calls, because you’re expecting something important or you want to be available to the people you know, and just get rid of the others. In these cases, the Do Not Disturb button isn’t ideal.
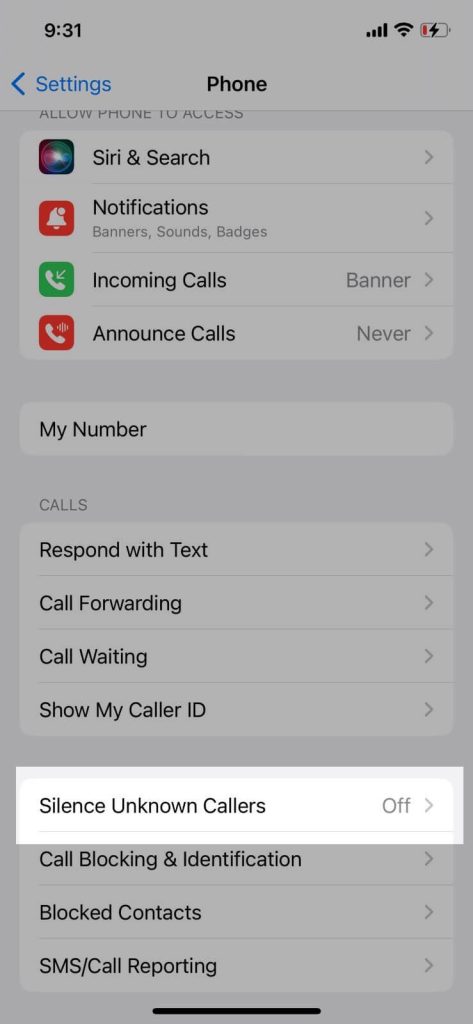
That means you might want to try the Silence Unknown Callers feature, which some newer iOS devices offer (iOS 13 and later). This feature can be found by clicking on Settings, then Phone, and then scrolling down until you see Silence Unknown Callers.
This will cause calls from unknown numbers to go to voicemail, rather than causing your phone to ring. The number will also appear in the recent calls list.
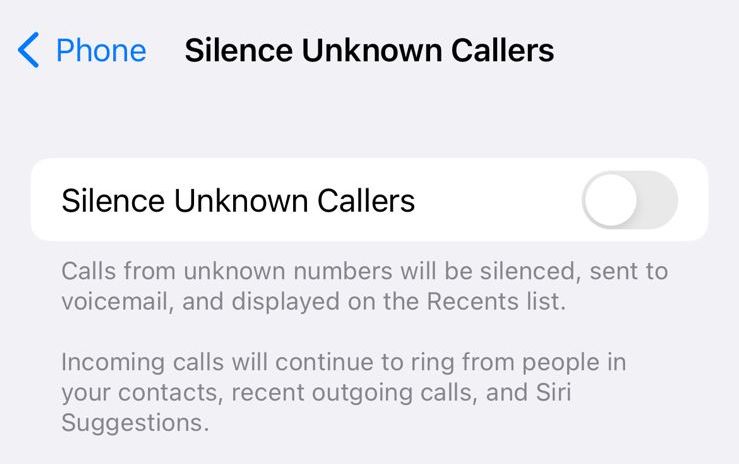
Only numbers that are completely unknown to your phone will be silenced. Recent numbers that you have called or messaged will still ring, even if they aren’t in your contacts list. This is a great way to reduce interruptions without missing out on calls you need to answer.
Configuring “Allow Calls From”: Ensuring Important Contacts Can Still Reach You
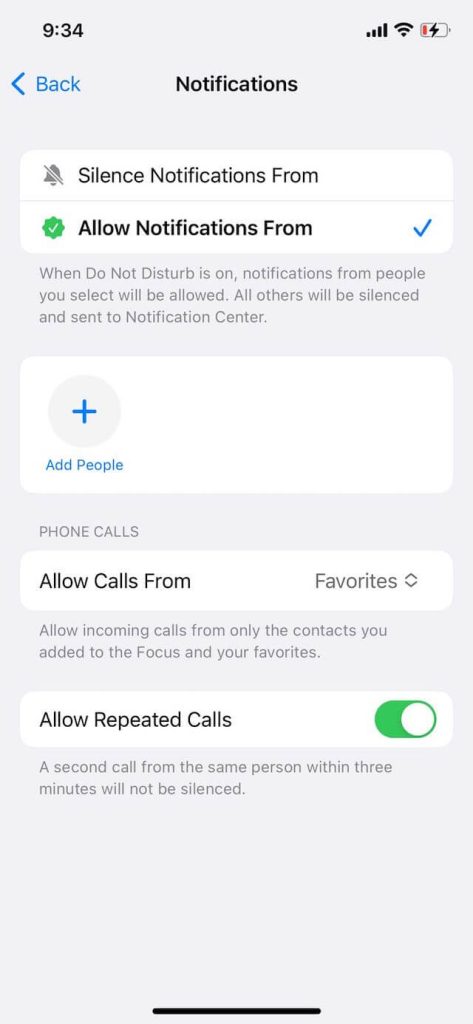
The Allow Calls From feature is also really useful and appears within the Silence Unknown Callers settings. You can create a group of contacts whose calls you want to get through and filter all the rest.
To do this, go into Settings, and then into Focus and Do Not Disturb. Turn Do Not Disturb on, and then in the Phone section, tap “Allow Calls From.” This will let you allow calls from contacts set as Favorites, or let you make an exception for an existing Contacts Group. Note that to make these groups, you need to use iCloud on a Mac.
You can also allow individual people if you don’t want to use a group. To do this, simply open the Contacts list, click on the contact that you want to be able to bypass the Do Not Disturb, then tap “Edit” in the upper right corner. Next, scroll to “Ringtone” and tap on it, and then turn Emergency Bypass to On.
You can do the same with texts if you want texts but not calls to come through. Texts and/or calls for this number should now bypass your Do Not Disturb.
Managing Call Blocking: Taking Additional Steps to Silence Specific Numbers
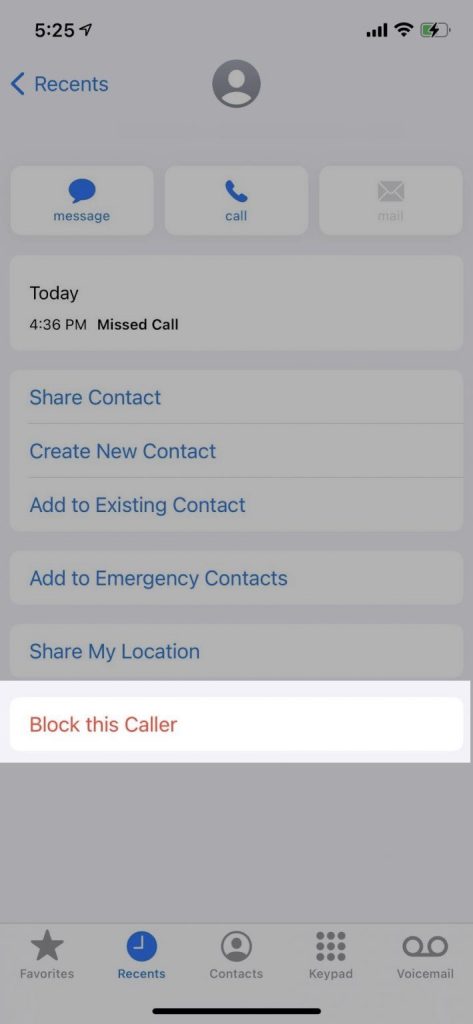
If you want to block a specific number, you can do this too, using a built-in blocking feature. If you’ve got particularly persistent callers, you can just block their number.
To do this, go into the Recent calls and locate their number. Tap the little “i” icon beside the number, and scroll down until you see “Block this Caller.” Tap on it, and the number will be blocked.
To block a contact, click on the Contact, and then scroll down and tap Block this Caller. This will prevent persistent callers from being able to call you.
Third-Party Call Blocking Apps: Enhancing Call Filtering Capabilities
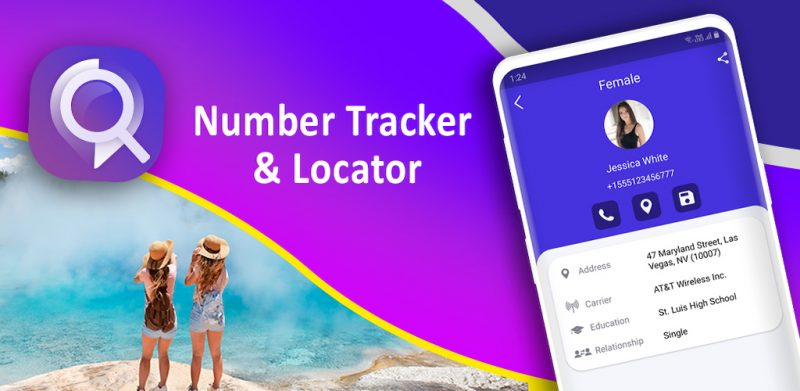
There are lots of third-party apps that can give you more control over your call-filtering options and abilities. These offer number lookup options, spam identification, call blocking, and more.
Apps like Robo Shield, Truecaller, Nomorerobo Robocall Blocking, and Robokiller will all help you deal with nuisance numbers. They help you to block and filter calls, and RoboKiller even makes a point of wasting the caller’s time using an answering machine that will record them. There are lots of great options out there.
You can also use apps like Number Tracker Pro to find out who is calling you. By entering the number into the search, you can find out who a number belongs to. This makes it much easier to decide whether to answer that number or not, allowing you to more easily manage your phone.
You can quickly check if a number is legitimate using the app, and then decide whether you want to answer it, ignore it, or block it. This makes it much easier to identify spam, scammers, and legitimate callers.
Best Practices to Avoid Unwanted Calls: Protecting Yourself from Unwanted Intrusions

There are a few things you can do to reduce the number of unwanted calls you get, too. Being careful about who you give personal information to is key. You can avoid a lot of nuisance calls simply by exercising caution about handing out your phone number and reducing the number of organizations you agree to be contacted by.
You can also try searching for your number online to see if anyone is displaying it, as this may increase your risk of scam calls. You can ask websites to remove your personal information and they should take it down, which will reduce the number of scam calls you get.
Not picking up scammers and spam callers can also help. That might surprise you, but if they consistently don’t get a response, many fraudsters will give up, as the calls cost them time and money. Be vigilant, and only answer your phone when you have to.
If you do pick up a scam caller, make sure you hang up promptly and don’t engage with them.
Adjusting Notification Settings: Customizing Alerts for a Disturbance-free Experience
You can also customize your notification settings to make sure certain contacts always get through, without having to be disturbed by unimportant or unwanted calls.
Things like enabling the Emergency Bypass feature as described above are a good start, but there are other things you might want to consider. For example, adding a custom ringtone for certain individuals can be a great way to ensure you know who is calling and you never miss their call.
Choose loud, noticeable ringtones, and you’re more likely to hear when an important call comes in. You can also set your phone to vibrate if you don’t want it to make a noise but you do want to be alerted to activities like calls and texts.
Regularly Updating iOS: Leveraging the Latest Security and Privacy Enhancements
It’s important to always keep your iPhone’s operating system up to date, as this allows you access to the latest features and maximizes your security. You’ll be able to access any new privacy enhancements that get released, which lets you protect yourself from unwanted calls.
It’s a good idea to back your phone up before installing a new update. You can do this using the iCloud. When you have finished, put your device on charge and make sure you’re connected to the Wi-Fi.
From there, go into Settings, General, and then hit “Software Update.” You should see the “Install Now” option, or sometimes you will be prompted to download it instead. If so, enter your passcode, wait for it to download, and then proceed with the installation.
Try to do this regularly so you can make the most of security and privacy features and protect yourself from nuisance calls.
Conclusion
Receiving incessant calls from unknown numbers is disruptive and frustrating, and can turn your phone from a useful device into a nuisance. However, your iPhone is equipped with plenty of tools and features that will help you to take back control and get rid of unwanted calls. By following the steps outlined above, you can enjoy peace and quiet. With the Do Not Disturb mode, the Silence Unknown Callers feature, and configuration options for call blocking, you have a range of tools at your disposal. You can also utilize third-party call-blocking apps to further reduce the number of unwanted calls you receive.
You can supplement this by customizing your notification settings, updating your iOS frequently, and being cautious about who you share personal information with. This should help to limit how many nuisances calls you get and ensure your phone is protected from viruses.
Take back control and eliminate nuisance calls from your phone using the options above. Your phone shouldn’t be a source of frustration, and with these tricks, it doesn’t have to be!
- Monitor Calls & Text Messages
- View Photos and Videos
- Location Tracking & Geofence
- Monitor WhatsApp & Kik
- Detect & Alert for Inappropriate Activities
- Monitor Websites Visited
- Compatible with Android and iOS

